Mobile App Security Risks and How to Mitigate Them

Mobile app security is a moving target. The need for better functionalities and features along with rapid deployment of software updates often comes at the expense of mobile security.
One of the major concerns for mobile app development is the rising mobile app security risks, particularly to prevent data breaches.
According to a study, over 10,573 malicious mobile apps were blocked per day in 2018.As technology advances, it has not only become easier to build and deploy apps, but also easy to crack a mobile application’s security as developers are still writing insecure code.
Some attackers might try to crack a mobile app to find out more about the special features and other information about your mobile application. Others might do it to breach backend services.
But how do you avoid such mobile security threats?
Let’s find out.
Top Mobile App Security Risks and Ways to Mitigate Them
Here are the top mobile app security risks and ways to mitigate them:
In a common mobile app, data is typically exchanged in a client-server fashion. When the application transmits data, it traverses through the internet and the mobile device’s carrier network.
1. Insecure Communication
Attackers might exploit mobile security vulnerabilities to intercept sensitive information or user data while it is traversing across the network.
What are the threat agents that exist in insecure communication?
• Malware on your mobile device
• A malicious actor who shares your local network (monitored or compromised wifi)
• Carrier or network devices (proxies, cell towers, routers, etc.)
Mobile developers often use SSl/TLS only during authentication but not elsewhere. This leads to an inconsistent security layer which increases the risk of exposing sensitive data such as credentials, personal information, session IDs, and more to interception by attackers.
Having a SSL/TLS does not imply that the mobile application is entirely secure. You need to implement strong security protocols throughout the mobile application and its network.
How Can You Prevent Insecure Communication?
Only establish a secure connection after authenticating the identity of the endpoint server. While applying SSL/TLS to your mobile application, make sure you implement it on the transport channels that the mobile app will use to transverse sensitive data such as session tokens, credentials, etc.
Use strong, industry standard cipher suites with appropriate key lengths. Apart from this, also consider using certificates signed by a trusted CA provider and refrain from allowing self-signed certificates. You should also consider certificate pinning for sensitive applications.
Remember to account for third-parties like social networks as well by using their TLS versions when a mobile application runs a routine using webkit/browser.
2. Lack of Input Validation
Consider applying an additional layer of encryption to any sensitive data before it is even given to the SSL channel. If security vulnerabilities are found in the SSL implementation, the encryption layer will act as a secondary defense against attacks.
Input validation is the process of assessing input data to ensure that it is properly formed, preventing malformed data that might consist of harmful code or may trigger malfunction in the mobile app.
What is the impact of poor input validation in mobile apps?
Why is it a mobile security threat? Here’s why:
When the mobile application does not validate input properly, it puts the application at risk of exposure to attackers who might be able to inject malicious data input and gain access to sensitive data in the app or breach backend data stores.
Ideally, input validation should occur instantly after the data is received from an external system. This includes data from third-party vendors, partners, regulators, or suppliers, each of which could be compromised to deliver malformed data.
While input validation is not sufficient to be used as a primary defense against preventing mobile app security risks, it is a significant way to filter out malicious data if implemented properly.
How Can You Prevent Weak Input Validation?
\You can implement input validation by using programming techniques that facilitate the effective enforcement of data correctness such as:
• Minimum and maximum value range check for dates and numerical parameters along with length check of strings
• Input validation against XML Schema and JSON Scheme
• Minimum and maximum value range check for strings, minimum and maximum length check for dates and numerical parameters.
• Regular expressions for any other structured data covering the entire input string (^...$) and avoiding using "any character" wildcard (e.g. as . or
• Array of permitted values for small sets of string parameters (e.g. hours of days)
Alternatively, a more efficient way to prevent attacks caused by poor input validation is to only allow known good rather than only rejecting known bad. This can set up much more stringent controls if done properly.
If the input data is structured like social security numbers, dates, email addresses, zip codes, etc, then the mobile app developer should be able to build and implement a strong input data validation pattern on the basis of regular expressions.
However, if the input data comes in a fixed set of options, such as radio buttons or drop down list, then the input data should match exactly as one of the options available to the user from the mobile application.
Final Thoughts
It is not possible to learn about all of the mobile app security risks that exist. But with the help of the above information about the most common mobile app security risks, you can secure your mobile apps from the biggest security threats.
Related Post
.png) Feb 13, 2023
Feb 13, 2023
Top Five Free Ai Content Generator: Free Ai Content Generator 2023
The soul of a website is called the content. So it is easy to understand that the website has no value without content. And writing content takes a lot of research. There is a lot to think about. Whether it is WordPress or Blogspot, everyone knows how hard it is to write content. But what if these contents become automatically generated? Yes, you are right, today I will talk about something like this in this article. Today I will share with you five free AI content generators that are completely free.What Is Ai Generated Content?Before knowing what AI content is, we need to know what AI is. AI is Artificial Intelligence. Many people have more or fewer ideas about artificial intelligence. But for those who don't know. Artificial intelligence is when a machine such as a computer can make decisions by itself, it is called artificial intelligence. Now let me tell you what AI content is. AI content means you just give a few hints and it will automatically write the entire content within seconds. This content is called AI-generated content.Is Ai Generated Content Unique?Yes, Of course. Because these AI-generated contents are generated by different AI content generators completely by themselves. So it will give you completely unique content. AI content generators will write the content based on the topic which are you give.How Does Ai Content Generator Work?The way Ai content generators work is that You first give the generator little hints about the topic you want to write about like it might ask you for a headline. Give some keywords in the topic and it will generate unique content for you in a few seconds.Best Free Ai Content Generator ToolsThere are many AI generator tools. But today I will talk about 5 content generators that are better than other content generators and easy to use. And these content generators will give you much better content than any other content generator.Simplified- Content Generator ToolSimplified is one of the best content generator tools. There are a lot of free tools you'll find here. You can generate up to five thousand words by Simplified which is huge. And also there are a lot of free features available in Simplified.1. Ryter: An All In One Content WriterRyter is a next-level content generator tool Because it can understand the language model deeply. For this reason, it can generate the best content. You can use all the features for free but you can only generate 5000 words per month.2. Copy Ai Free Ai Content GeneratorCopy AI is the best content generator of any other tool. Because it is built on the world's best ai technology. So it can generate more creative and best content very fast. You can generate 100 pieces of content in the first months by Copy Ai Free Content Generator.3. Content Bot Advance AI WriterContent Bot Advance AI Writer tool can generate content from any short hints or keywords. And it's a very powerful content generator tool. You can generate 500 pieces of content per month and one thousand five hundred long-form editor words every month. But it's a little bit hard to use.4. Smart Copy By UnbounceSmart Copy is one of the advanced level AI writing tools. You can use it to generate your content You can use all features fully free but you can generate only 5 articles per day.So here is the top five best AI content generator tool you can use a lot of free features without purchasing it but there is a few limitations. So try to use free features.
Read More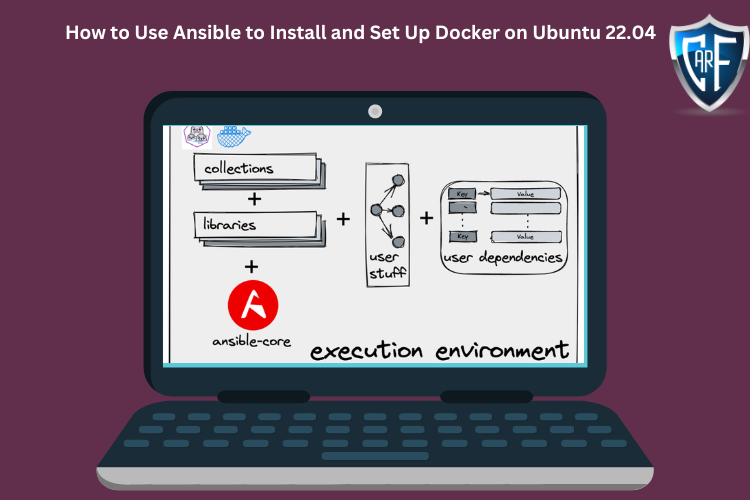 Feb 6, 2023
How to Use Ansible to Install and Set Up Docker on Ubuntu 22.04
IntroductionServer automation now plays an essential role in systems administration, due to the disposable nature of modern application environments. Configuration management tools such as Ansible are typically used to streamline the process of automating server setup by establishing standard procedures for new servers while also reducing human error associated with manual setups.Ansible offers a simple architecture that doesn’t require special software to be installed on nodes. It also provides a robust set of features and built-in modules which facilitate writing automation scripts.This guide explains how to use Ansible to automate the steps contained in our guide on How To Install and Use Docker on Ubuntu 22.04. Docker is an application that simplifies the process of managing containers, resource-isolated processes that behave in a similar way to virtual machines, but are more portable, more resource-friendly, and depend more heavily on the host operating system.PrerequisitesIn order to execute the automated setup provided by the playbook in this guide, you’ll need:One Ansible control node: an Ubuntu 22.04 machine with Ansible installed and configured to connect to your Ansible hosts using SSH keys. Make sure the control node has a regular user with sudo permissions and a firewall enabled, as explained in our Initial Server Setup guide. To set up Ansible, please follow our guide on How to Install and Configure Ansible on Ubuntu 22.04.One or more Ansible Hosts: one or more remote Ubuntu 22.04 servers previously set up following the guide on How to Use Ansible to Automate Initial Server Setup on Ubuntu 22.04.Before proceeding, you first need to make sure your Ansible control node is able to connect and execute commands on your Ansible host(s). For a connection test, check Step 3 of How to Install and Configure Ansible on Ubuntu 22.04.What Does this Playbook Do?This Ansible playbook provides an alternative to manually running through the procedure outlined in our guide on How To Install and Use Docker on Ubuntu 22.04. Set up your playbook once, and use it for every installation after.Running this playbook will perform the following actions on your Ansible hosts:Install aptitude, which is preferred by Ansible as an alternative to the apt package manager.Install the required system packages.Install the Docker GPG APT key.Add the official Docker repository to the apt sources.Install Docker.Install the Python Docker module via pip.Pull the default image specified by default_container_image from Docker Hub.Create the number of containers defined by the container_count variable, each using the image defined by default_container_image, and execute the command defined in default_container_command in each new container.Once the playbook has finished running, you will have a number of containers created based on the options you defined within your configuration variables.To begin, log into a sudo enabled user on your Ansible control node server.Step 1 — Preparing your PlaybookThe playbook.yml file is where all your tasks are defined. A task is the smallest unit of action you can automate using an Ansible playbook. But first, create your playbook file using your preferred text editor:nano playbook.yml CopyThis will open an empty YAML file. Before diving into adding tasks to your playbook, start by adding the following:playbook.yml--- - hosts: all become: true vars: container_count: 4 default_container_name: docker default_container_image: ubuntu default_container_command: sleep 1 CopyAlmost every playbook you come across will begin with declarations similar to this. hosts declares which servers the Ansible control node will target with this playbook. become states whether all commands will be done with escalated root privileges.vars allows you to store data in variables. If you decide to change these in the future, you will only have to edit these single lines in your file. Here’s a brief explanation of each variable:container_count: The number of containers to create.default_container_name: Default container name.default_container_image: Default Docker image to be used when creating containers.default_container_command: Default command to run on new containers.Note: If you want to see the playbook file in its final finished state, jump to Step 5. YAML files can be particular with their indentation structure, so you may want to double-check your playbook once you’ve added all your tasks.Step 2 — Adding Packages Installation Tasks to your PlaybookBy default, tasks are executed synchronously by Ansible in order from top to bottom in your playbook. This means task ordering is important, and you can safely assume one task will finish executing before the next task begins.All tasks in this playbook can stand alone and be re-used in your other playbooks.Add your first tasks of installing aptitude, a tool for interfacing with the Linux package manager, and installing the required system packages. Ansible will ensure these packages are always installed on your server:playbook.yml tasks: - name: Install aptitude apt: name: aptitude state: latest update_cache: true - name: Install required system packages apt: pkg: - apt-transport-https - ca-certificates - curl - software-properties-common - python3-pip - virtualenv - python3-setuptools state: latest update_cache: true CopyHere, you’re using the apt Ansible built-in module to direct Ansible to install your packages. Modules in Ansible are shortcuts to execute operations that you would otherwise have to run as raw bash commands. Ansible safely falls back onto apt for installing packages if aptitude is not available, but Ansible has historically preferred aptitude.You can add or remove packages to your liking. This will ensure all packages are not only present, but on the latest version, and do after an update with apt is called.Step 3 — Adding Docker Installation Tasks to your PlaybookYour task will install the latest version of Docker from the official repository. The Docker GPG key is added to verify the download, the official repository is added as a new package source, and Docker will be installed. Additionally, the Docker module for Python will be installed as well:playbook.yml - name: Add Docker GPG apt Key apt_key: url: https://download.docker.com/linux/ubuntu/gpg state: present - name: Add Docker Repository apt_repository: repo: deb https://download.docker.com/linux/ubuntu jammy stable state: present - name: Update apt and install docker-ce apt: name: docker-ce state: latest update_cache: true - name: Install Docker Module for Python pip: name: docker CopyYou’ll see that apt_key and apt_repository built-in Ansible modules are first pointed at the correct URLs, then tasked to ensure they are present. This allows installation of the latest version of Docker, along with using pip to install of the module for Python.Step 4 — Adding Docker Image and Container Tasks to your PlaybookThe actual creation of your Docker containers starts here with the pulling of your desired Docker image. By default, these images come from the official Docker Hub. Using this image, containers will be created according to the specifications laid out by the variables declared at the top of your playbook:playbook.yml - name: Pull default Docker image community.docker.docker_image: name: "{{ default_container_image }}" source: pull - name: Create default containers community.docker.docker_container: name: "{{ default_container_name }}{{ item }}" image: "{{ default_container_image }}" command: "{{ default_container_command }}" state: present with_sequence: count={{ container_count }} Copydocker_image is used to pull the Docker image you want to use as the base for your containers. docker_container allows you to specify the specifics of the containers you create, along with the command you want to pass them.with_sequence is the Ansible way of creating a loop, and in this case, it will loop the creation of your containers according to the count you specified. This is a basic count loop, so the item variable here provides a number representing the current loop iteration. This number is used here to name your containers.Step 5 — Reviewing your Complete PlaybookYour playbook should look roughly like the following, with minor differences depending on your customizations:playbook.yml--- - hosts: all become: true vars: container_count: 4 default_container_name: docker default_container_image: ubuntu default_container_command: sleep 1d tasks: - name: Install aptitude apt: name: aptitude state: latest update_cache: true - name: Install required system packages apt: pkg: - apt-transport-https - ca-certificates - curl - software-properties-common - python3-pip - virtualenv - python3-setuptools state: latest update_cache: true - name: Add Docker GPG apt Key apt_key: url: https://download.docker.com/linux/ubuntu/gpg state: present - name: Add Docker Repository apt_repository: repo: deb https://download.docker.com/linux/ubuntu jammy stable state: present - name: Update apt and install docker-ce apt: name: docker-ce state: latest update_cache: true - name: Install Docker Module for Python pip: name: docker - name: Pull default Docker image community.docker.docker_image: name: "{{ default_container_image }}" source: pull - name: Create default containers community.docker.docker_container: name: "{{ default_container_name }}{{ item }}" image: "{{ default_container_image }}" command: "{{ default_container_command }}" state: present with_sequence: count={{ container_count }} CopyFeel free to modify this playbook to best suit your individual needs within your own workflow. For example, you could use the docker_image module to push images to Docker Hub or the docker_container module to set up container networks.Note: This is a gentle reminder to be mindful of your indentations. If you run into an error, this is very likely the culprit. YAML suggests using 2 spaces as an indent, as was done in this example.Once you’re satisfied with your playbook, you can exit your text editor and save.Step 6 — Running your PlaybookYou’re now ready to run this playbook on one or more servers. Most playbooks are configured to be executed on every server in your inventory by default, but you’ll specify your server this time.To execute the playbook only on server1, connecting as sammy, you can use the following command:ansible-playbook playbook.yml -l server1 -u sammy CopyThe -l flag specifies your server and the -u flag specifies which user to log into on the remote server. You will get output similar to this:Output. . . changed: [server1] TASK [Create default containers] ***************************************************************************************************************** changed: [server1] => (item=1) changed: [server1] => (item=2) changed: [server1] => (item=3) changed: [server1] => (item=4) PLAY RECAP *************************************************************************************************************************************** server1 : ok=9 changed=8 unreachable=0 failed=0 skipped=0 rescued=0 ignored=0 Note: For more information on how to run Ansible playbooks, check our Ansible Cheat Sheet Guide.This indicates your server setup is complete! Your output doesn’t have to be exactly the same, but it is important that you have zero failures.When the playbook is finished running, log in via SSH to the server provisioned by Ansible to check if the containers were successfully created.Log in to the remote server with:ssh sammy@your_remote_server_ip CopyAnd list your Docker containers on the remote server:sudo docker ps -a CopyYou should see output similar to this:OutputCONTAINER ID IMAGE COMMAND CREATED STATUS PORTS NAMES a3fe9bfb89cf ubuntu "sleep 1d" 5 minutes ago Created docker4 8799c16cde1e ubuntu "sleep 1d" 5 minutes ago Created docker3 ad0c2123b183 ubuntu "sleep 1d" 5 minutes ago Created docker2 b9350916ffd8 ubuntu "sleep 1d" 5 minutes ago Created docker1 This means the containers defined in the playbook were created successfully. Since this was the last task in the playbook, it also confirms that the playbook was fully executed on this server.ConclusionAutomating your infrastructure setup can not only save you time, but it also helps to ensure that your servers will follow a standard configuration that can be customized to your needs. With the distributed nature of modern applications and the need for consistency between different staging environments, automation like this has become a central component in many teams’ development processes.In this guide, you demonstrated how to use Ansible to automate the process of installing and setting up Docker on a remote server. Because each individual typically has different needs when working with containers, we encourage you to check out the official Ansible documentation for more information and use cases of the docker_container Ansible module.If you’d like to include other tasks in this playbook to further customize your initial server setup, please refer to our introductory Ansible guide Configuration Management 101: Writing Ansible Playbooks.
Read More